MxSW2-hi Setup

This is the dedicated MxSW2-hi Cooling Stand product setup page. See the main product setup page for other product setup guides. The page includes the following sections:
MxSW2-hi Shipment Unboxing
 Overview
Use the following step-by-step guide for unpacking, and refer to the unpacking labels placed on packaging materials.
 1. Open Shipping Box
- Only open from the top, do not attempt to open the box from the bottom. The top of the box includes the shipping label, while the bottom of the box has printed box manufacturer details.
- The box is sealed with recyclable reinforced paper packing tape. Cut along the two top edges and then down the middle. A packing slip is placed on the top of the interior packing.
 2. Remove Top Layer
- Pull up on both of the labeled paper tape tabs to remove the top protective layer of hex cardboard.
 3. Remove Items
- Use the finger hole cutout in the top of the cardboard to open the lid and remove the accessories box and expansion packing paper from both sides of the heatsink.
- Find the Support Tool hex key/drive in the accessory boxes.
- Find the empty Packaging Hardware envelope in the accessory boxes.
 4. Remove Heatsink
- Limit contact with the heatsink's top laptop coupling plate.
- Grip the heatsink on the two open sides, and pull up to remove the heatsink and attached cardboard packing supports.
 5. Remove Middle Layer
- Pull up on both of the labeled paper tape tabs to remove the middle protective layer of hex cardboard.
 6. Remove Supports
- Pull up on both of the labeled paper tape tabs to remove the supports and attached cardboard packing sheets.
 7. Remove Cardboard From Heatsink
- Use the Support Tool hex key/drive to remove fasteners and washers attaching the folded cardboard supports to heatsink.
- Place heatsink on side with cardboard panels folded flat.
- Remove fasteners and washers, and then place inside envelop labeled Packaging Hardware.
- Remove cardboard support.
- Flip heatsink to other side and repeat.
 8. Remove Cardboard From Supports
- Place cardboard support assembly with fastener nuts facing up.
- Remove nuts and washers, and then place inside Packaging Hardware envelop.
- Remove top layer of cardboard.
- Remove supports.
- Repeat as needed for additional layers of cardboard and supports.
- Remove fasteners and washers, and then place inside Packaging Hardware envelop.
 9. Store Packaging
- Please retain Mx packaging for product / component storage and transport.
- Please retain accessories and tools for product / component servicing and upgrades.
- Place the two layers of hex cardboard into box with tabs folded over and facing up.
- Place the two support cardboard sheets into box with the bottom layer's tabs folded over the top layer and facing up.
- Place the two heatsink cardboard sheets into the box folded flat.
- Place expansion packing paper into box.
- Place Packaging Hardware envelop into the accessory box.
 10. Recycle Packaging
- Please recycle the packaging if you no longer wish to keep it for storage and transport.
- Note: The Mx product line uses a Sustainable Modular Packaging System. The packaging system is made of cardboard and paper, which is easily recyclable. Even the packing tape is made of paper and is recyclable. A single cardboard box serves as both the shipping box and product box to reduce environmental impact.
MxSW2-hi Product Assembly
 Overview
Use the following step-by-step guide for assembling the MxSW2-hi Cooling Stand, and refer to the labels placed on tools and accessories.
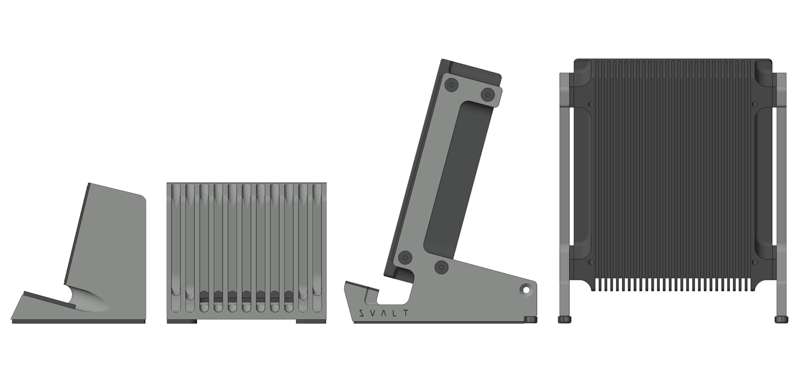
 1. Install High Supports
- Find the "Hi Back Fasteners" labeled envelope within the accessory boxes, and remove fasteners, washers, and cable straps. (5) fasteners/washers and (3) cable straps are included. (4) fasteners/washers for attaching high stand supports to heatsink, and (1) as a spare. (2) cable straps for attaching to both sides of the supports, and (1) as a spare.
- Place heatsink on side. For heatsink configurations with attached 140mm fans, please note the fan cable/connector location and that it should be located towards the back of the high stand supports.
- Pull a high support. Select the high support that has the outer face with chamfer edges facing up so that the opposite side contacts the heatsink pads.
- Insert one washer onto each fastener. If you wish to install optional cable straps to hold and hide cables, then insert one of the straps onto one of the fasteners.
- Insert a fastener assembly into each of the two holes located at the back of the high supports. If you are installing the optional cable straps, then the cable strap can be installed in either the upper or lower holes, however, the lower hole is recommended for most applications/users.
- Align the high support and inserted fasteners with the two holes on the heatsink's back support mounting pad, and then insert fasteners into heatsink holes.
- Partially thread the fasteners into the heatsink. Do not tighten fasteners and instead leave loose so that the high supports can easily move up and down. Leave loose until after installing the laptop support arms in the following step 3 below.
 2. Install Arm Supports
- Find the "Hi Front Fasteners" labeled envelope within the accessory boxes, and remove fasteners. (5) fasteners are included, (4) for attaching laptop support arms to heatsink, and (1) as a spare.
- If you ordered both the large and small laptop support arms, then use the large arms for 2021+ 16-inch MacBook Pro and 2023+ 15-inch MacBook Air, or the small arms for 2021+ 14-inch MacBook Pro and 2022+ 13-inch MacBook Air. To learn more, and for information about compatibility for other laptop models, see the “Compatibility Specs” section found on the MxSW2-hi Cooling Stand product page.
- Select the laptop support arm that has the outer face with chamfer edges and SVALT logo facing up so that the opposite side contacts the high support.
- Insert fasteners into the arm’s two countersunk holes.
- Align the arm and the inserted fasteners with the two holes on the front of the high support, and then insert fasteners through high support holes and into heatsink holes.
- Partially thread the fasteners into the heatsink. Do not tighten fasteners and instead leave loose so that the high supports can easily move up and down. This movement allows the high support height to be adjusted for leveling uneven surfaces.
- Push up on the bottom of the high support for establishing a flat level. While pushing the high support upward, evenly tighten the arm's two front fasteners. Once the fasteners start to enter into the arm's countersunk holes, then tighten each fastener a little bit at a time. This will ensure that the arms are centered and aligned. Do not over-tighten as that may crush the wood.
- Once the arm fasteners are tightened, then tighten the back high support fasteners. Do not over-tighten as that may crush the wood.
 3. Repeat For Other Side
- Rotate heatsink 180 degrees so that the installed side support is facing down.
- Repeat the above steps 1 to 3 to install the other side supports.
MxSW2-hi Product Setup
 Overview
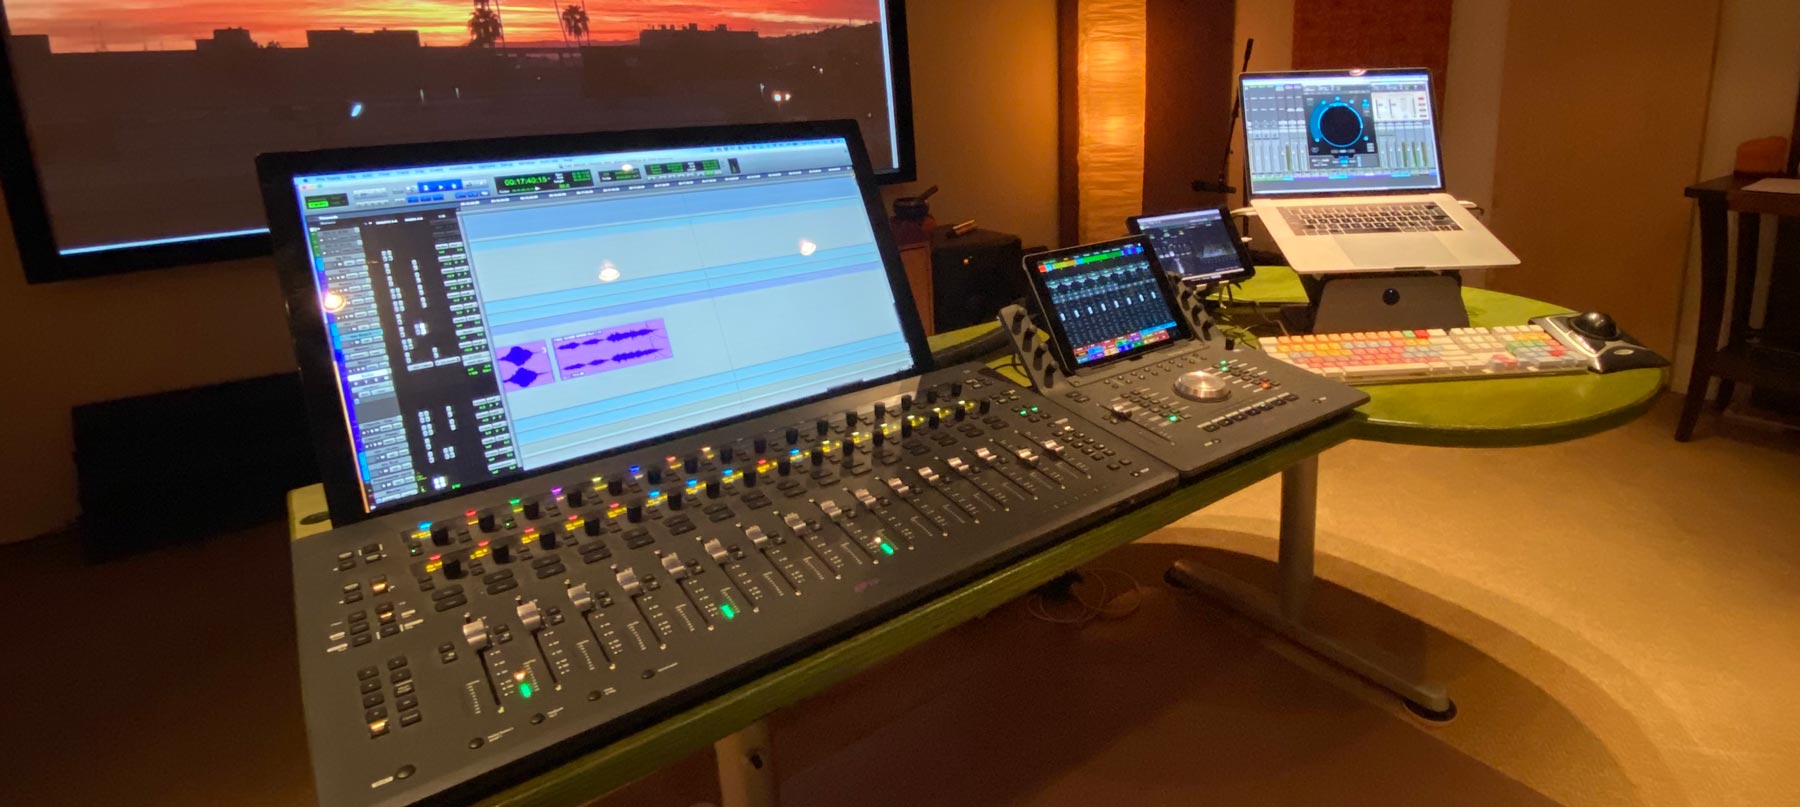
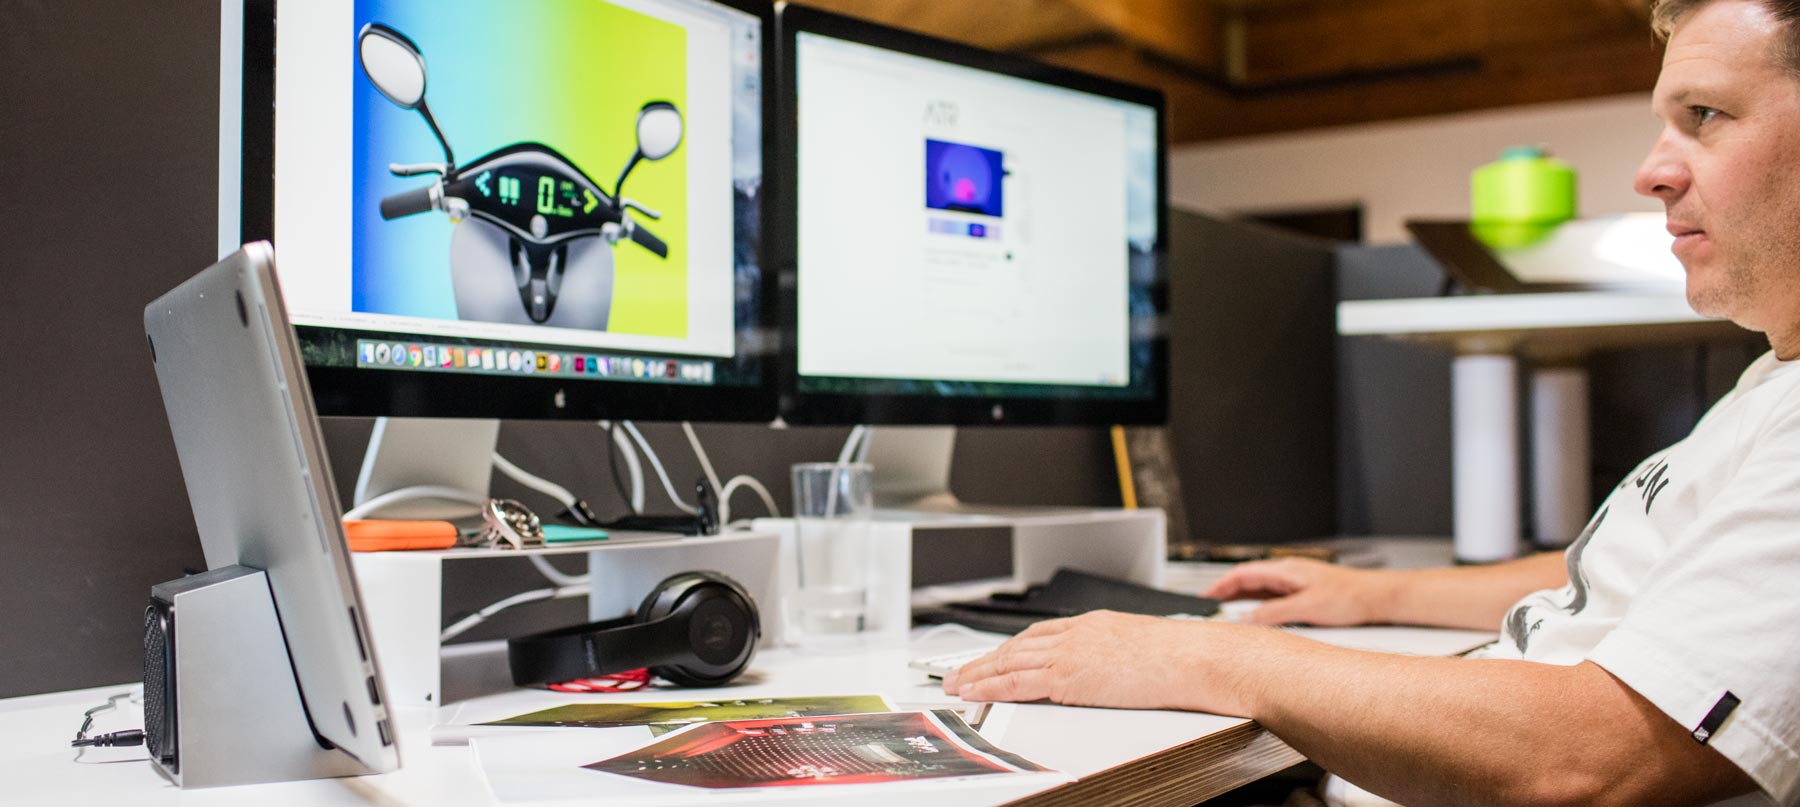
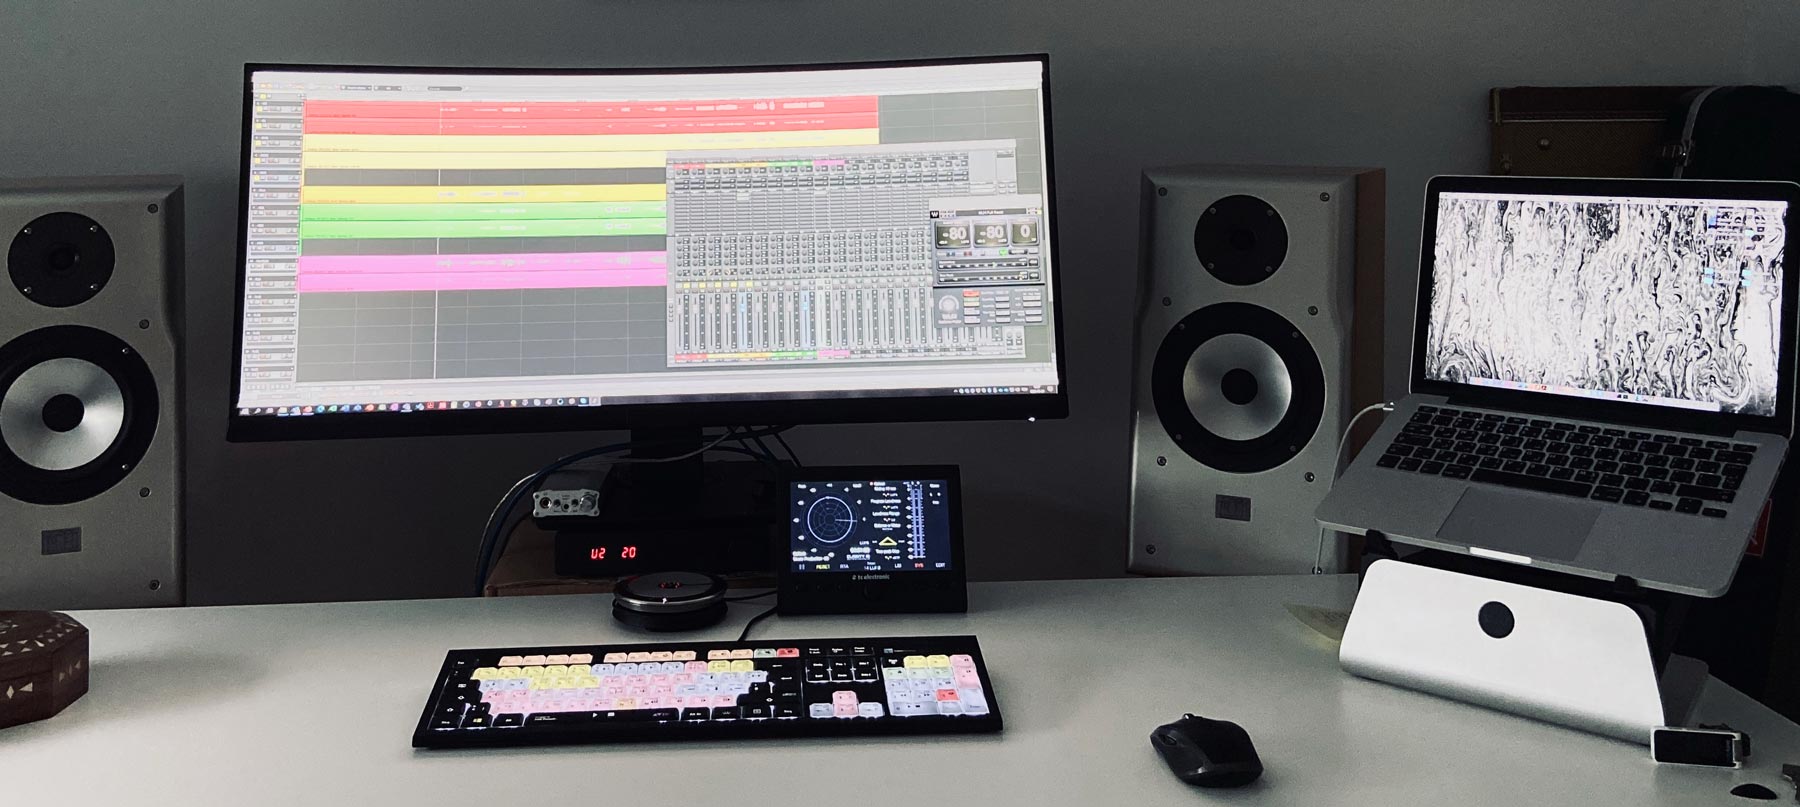
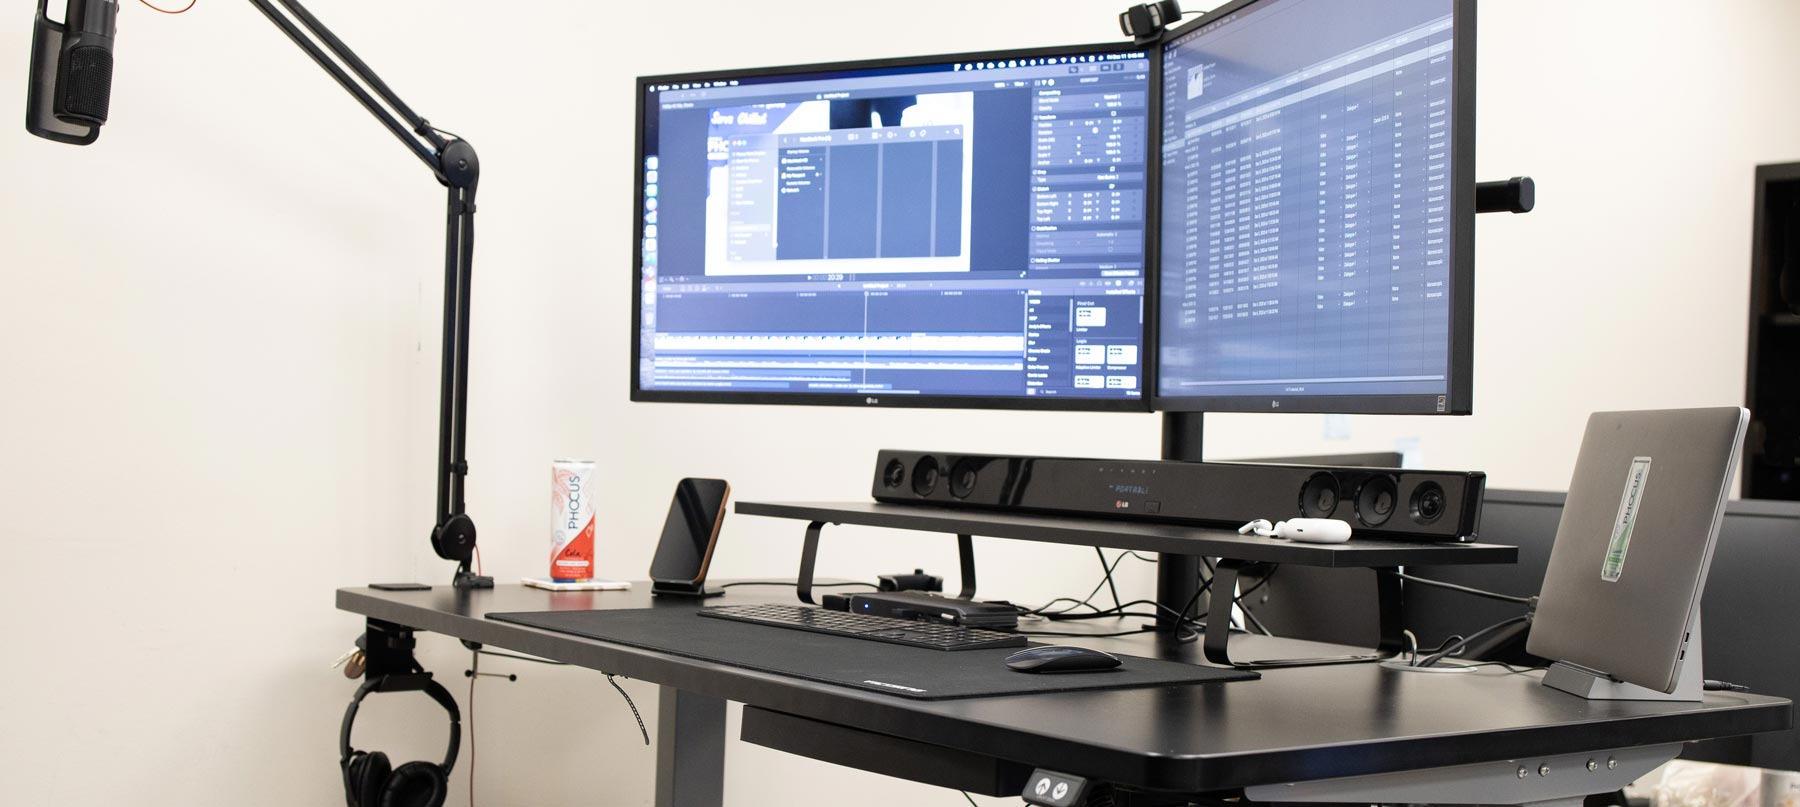
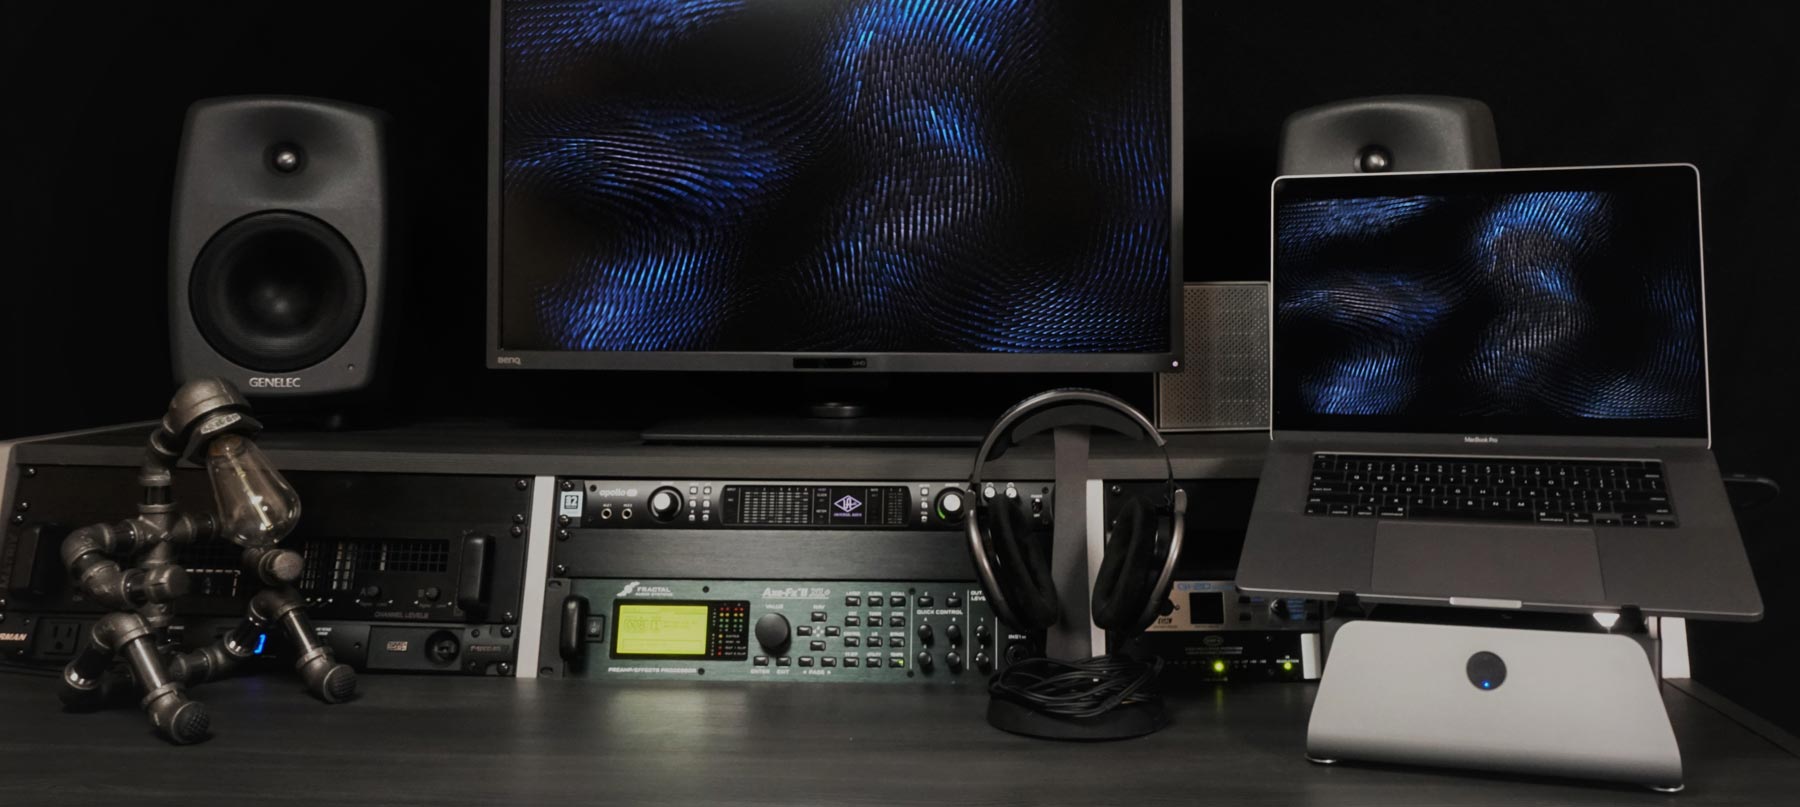
Use the following step-by-step guide for setting up the MxSW2-hi Cooling Stand, and refer to the labels placed on tools and accessories. Note that proper product setup has a significant impact on cooling performance.
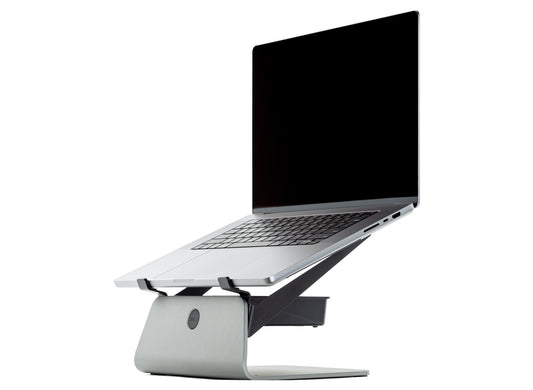
 1. Place Product
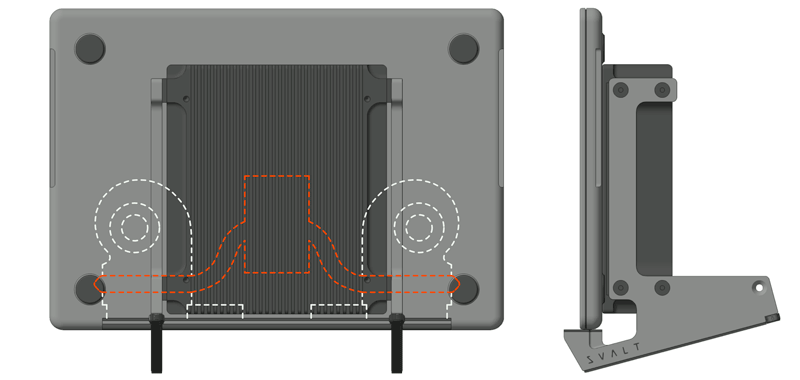
- ATTENTION: Product placement and workstation setup has a significant impact on cooling performance.
- Place product so that there is open space under the product and around all sides per the diagram above. Having sufficient open space under and behind the product and laptop is essential for proper operation, and should be as large as possible to improve cooling. Placing the back of the product and laptop up against a wall or other solid barrier can dramatically decrease cooling performance and lead to overheating.
- If table or other horizontal work surface is against a wall or solid barrier, then move table away from wall to create an air gap through which cool air can rise from below. A small 1-2 inch gap will help, and a larger gap will provide additional cooling airflow.
- Place product so that it avoids exposure to direct sunlight as it can dramatically decrease cooling performance.
- Placing any item under the product or laptop will reduce cooling performance. The product was designed to create and use optimal cooling airflows. Any item that disrupts or blocks those airflows could impact passive and active fan driven airflows that in turn could dramatically reduce cooling.
- Note: See the separate Workstation Setup page to learn more.
 2. Level Product
- This is an optional product setup step for leveling the product when used on uneven surfaces.
- Make sure the product is in the proper position because the level will be set for this specific location.
- Determine if leveling is needed by testing to see if the product rocks and moves back-and-forth. If it does move, then determine which of the two front corners move. The front corner that moves will be adjusted downward to level the product.
- For the side of the product that has the moving front corner, loosen the laptop support arm’s two front fasteners and the high support’s two back fasteners.
- Push down on the front of the high support, and while pressing down, evenly retighten the two front fasteners by slightly tightening one then the other fastener. Once the two front fasteners are tightened, then tighten the two back fasteners.
- In all but the most extreme cases, that should easily level an uneven surface. However, if additional surface leveling is needed, then on the product’s other side, adjust the back of the high support by pushing it down.
- To reset the product to flat for an even and level surface, place the product on its side with the support that was adjusted facing up. Loosen the four support fasteners, push up on the bottom of the high support, and evenly retighten the two front fasteners and then the two back fasteners.
 3. Fan System
- This is a product setup step for Mx configurations that include a 140mm fan cooling system, or for Mx customers that wish to do their own DIY setup.
- Fans: The 140mm fan and fan hardware ship bolted onto the heatsink.
- Accessories: Find the fan accessories in the accessory boxes, and remove contents: (1) on/off switch power cable adapter, (1) power supply, and (1) fan hex key tool. Adjustable-speed systems also include: (1) Noctua speed-controller, (2) Noctua extension cables, (1) Noctua 3-way splitter for simultaneous operation of 140mm and 80mm fans, and (1) Noctua power supply adapter for optional customer DIY setups.
- Placement: Confirm that supports were installed correctly so that fan cable/connector is in place. If this step of support installation was missed, then use the fan hex key tool to rotate fan and cable/connector.
- Setup: Connect the on/off switch adapter’s 3/4-pin connector to the fan’s 3-pin or 4-pin connector, and then connect the adapter’s other end 2.1mm power connector to the power supply. Insert the power adapter’s wall plug into a compatible power receptacle. For adjustable-speed systems, connect the Noctua speed-controller between the fan and on/off switch adapter, and use the Noctua extension cables as needed.
- Operation: Toggle the power switch to turn the fan on and off. For adjustable-speed systems, dial-in a fan speed between zero and maximum RPM.
- Optional: Plug the power supply into a user provided control strip to quickly power on and off an entire workstation, or plug the power supply into a user provided smart home / Apple HomeKit accessory to wirelessly control on/off operation or set an on/off operation schedule.
- Specs: Power Supply 12V DC 0.4A 5W max 2.1mm ID x 5.5mm OD plug. Switch Adapter 12V DC 1A max. Fan 12V DC 3 or 4-pin connector.
- Caution: Operating fan without finger guards installed can cause injury.
- Caution: Disconnect power before assembly/disassembly.
- Caution: Only SVALT provided parts should be used with fan systems. Customers that supply their own fan cooling system or parts for the system take full responsibility for the system that they add or that they modify.
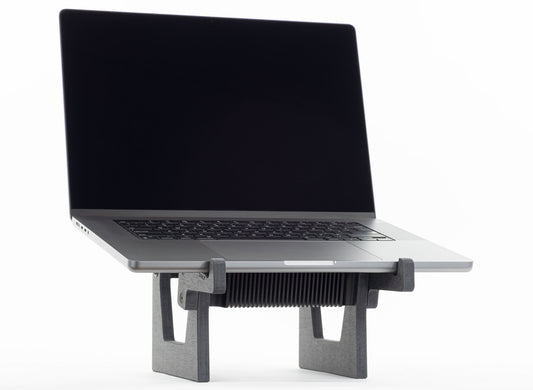
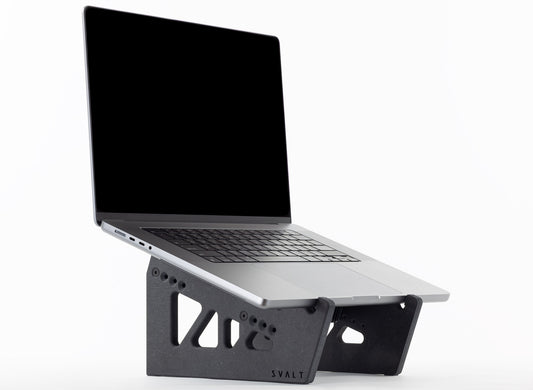
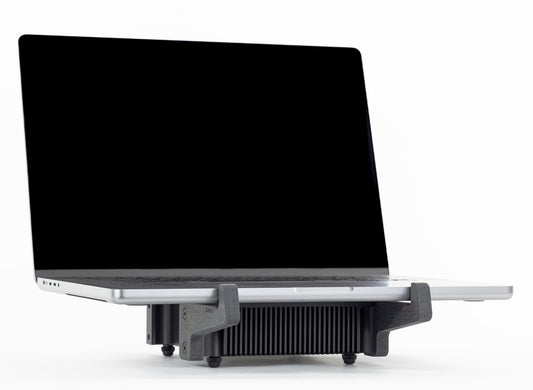
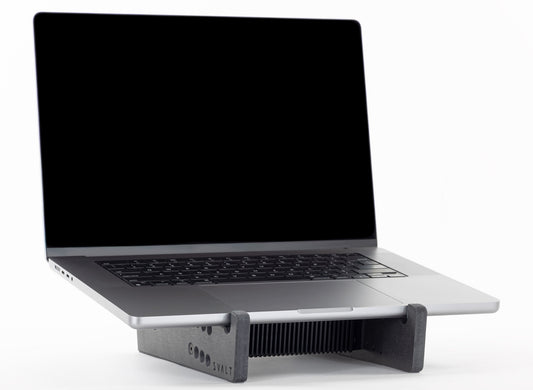
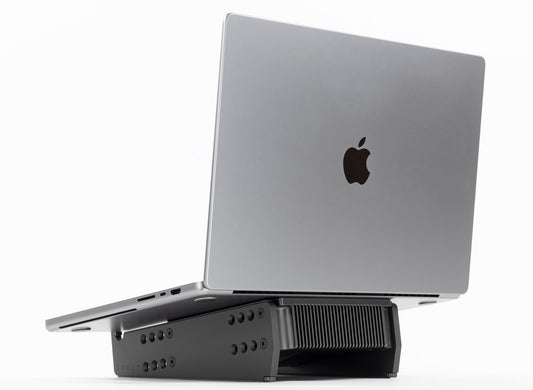
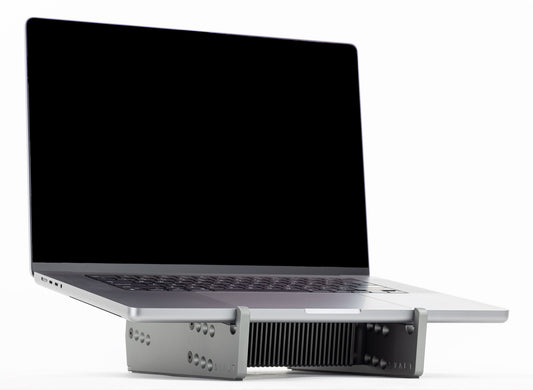
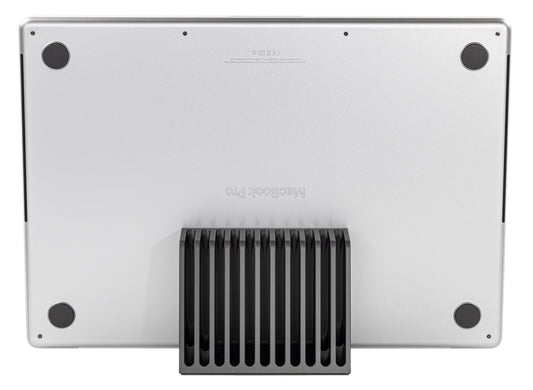
 4. Place Laptop
- ATTENTION: Laptop placement has a significant impact on cooling performance.
- Use the included cleaning cloth to remove any dust / debris from the heatsink’s top coupling plate surface and from the area of the laptop that will contact the heatsink. This improves heatsink coupling and reduces the potential for a hard object to become caught in-between the two surfaces.
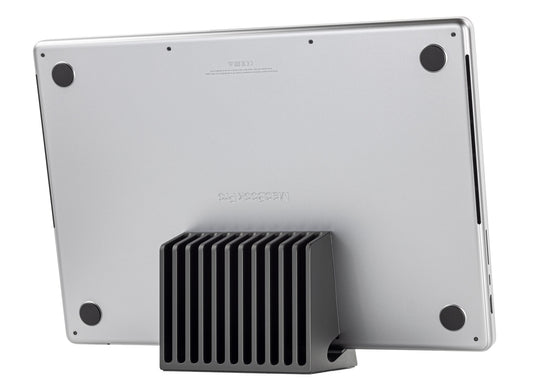
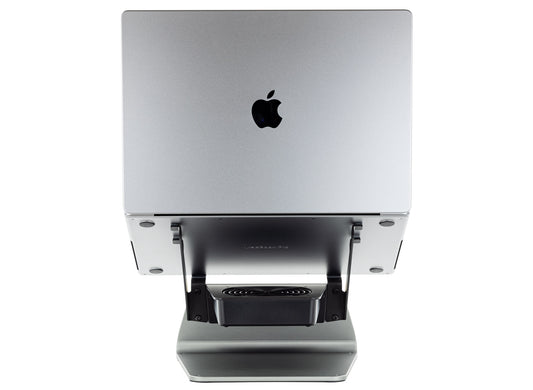
- Place the laptop onto the heatsink with the front edge of the laptop resting against the supports two forward padded laptop tabs.
- Center the laptop side-to-side on the heatsink by using laptop reference points. From the front, center the laptop by positioning it between the support’s two padded tabs. Alternately, from the back, center the laptop by aligning the laptop’s two center bottom panel fasteners with the heatsink’s corner cutouts.
- Once the laptop is centered, then make sure the laptop is sitting flat on top of the heatsink’s top coupling plate.
- Look from the side of the laptop and Mx to see if the laptop is flat against the heatsink’s coupling surface from front-to-back. Adjust the laptop positioning as required to achieve flat coupling.
- Look from the front or back of the laptop and Mx to see if the laptop is flat against the heatsink’s coupling surface from side-to-side. Adjust the laptop positioning as required to achieve flat coupling.
- Take extra care in centering the laptop from side-to-side on the heatsink to achieve optimal cooling performance. The Mx heatsink’s massive size with it’s width, heatsink corner cutouts and heatsink 140mm bolt-on fan placement have been precisely designed to match the vent spacing of the 2021+ MacBook Pro as well as prior 2016+ Touch Bar MacBook Pros and 2012+ Retina MacBook Pros.
- Take extra care in establishing contact across the heatsink’s coupling surface to achieve optimal cooling performance. The Mx’s massive heatsink has been designed to fully contact laptop’s with flat bottom enclosures, such as the current generation of 2021+ MacBook Pro and 2022+ MacBook Air laptops. Other laptops with more rounded or curved edges along the bottom enclosure will contact heatsink further from the edge. The recommended heatsink position on the supports takes the laptop model’s edge curved into consideration, and positions the heatsink further back than with flat bottom laptop models. This helps to optimize heatsink performance for these less flat bottom laptop models.
- Covers and stickers placed on the bottom / back of the laptop’s metal enclosure will reduce heat transfer and largely prevent thermally conducive coupling. Removing these barriers is recommended for use with the heatsink. While not recommended, some customers may choose to remove non-conductive materials from the interior of the laptop’s bottom enclosure, and may take additional steps to add thermally conductive pads.
- Only use compatible laptops per the “Compatibility Specs” section found on the MxSW2-hi Cooling Stand product page.
 5. Connect Cables and Straps
- This is an optional accessory and product setup step. If you do not want to use the cable management system to hold and hide cables, then skip this step.
- Once the laptop is in place on the Mx, then connect cables to the laptop.
- Wrap the straps around the cable bundle.
- Once cables have been arranged and setup as desired, then the straps can be trimmed to length as needed to fit cable bundle.
MxSW2-hi Additional Resources
Use the following for additional setup and user guide resources.- See Workstation Setup page to learn about setting up your workstation and laptop for optimum performance and productivity.
- See Clamshell Setup page to learn about setting up and operating in clamshell mode.
- See MxSW2-lo Setup page for setting up a MxSW2-lo as the MxSW2-hi includes components for reconfiguring into a MxSW2-lo.
- See Upgrades page to learn about available upgrades.
- See Mx Components page for Mx modular components and accessories.
- See MxSW2-hi Cooling Stand product page for features and specifications.
-
Cooling Stand MxSW2-hi
Regular price From $399.00 USDRegular price$309.00 USDSale price From $399.00 USD -
Cooling Stand MxSW-hi
Regular price From $389.00 USDRegular price$309.00 USDSale price From $389.00 USD -
Cooling Stand MxSW2-lo
Regular price From $379.00 USDRegular price$309.00 USDSale price From $379.00 USD -
Cooling Stand MxSW-lo
Regular price From $379.00 USDRegular price$289.00 USDSale price From $379.00 USD -
Cooling Stand MxS-lo
Regular price From $429.00 USDRegular price$399.00 USDSale price From $429.00 USD -
Cooling Dock MxDW2
Regular price From $389.00 USDRegular price$299.00 USDSale price From $389.00 USD -
Cooling Dock DHCR
Regular price From $289.00 USDRegular price$279.00 USDSale price From $289.00 USD -
Cooling Stand Sx
Regular price From $279.00 USDRegular price


Product Selection Guides
-
 Compare
Compare product features and specifications.
-
 Laptops
Recommended products for your laptop model.
-
 Performance
Performance testing with a variety of laptops.