WORKSTATION
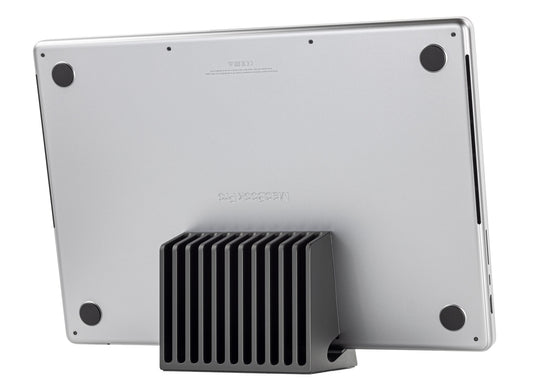
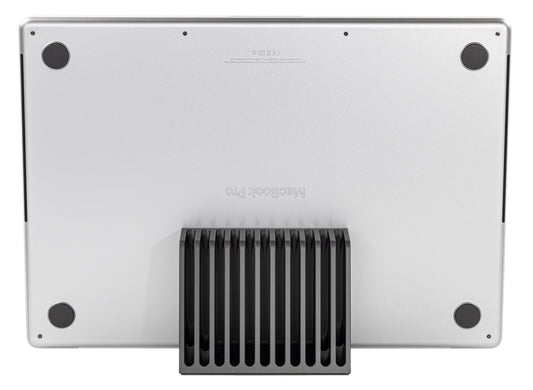
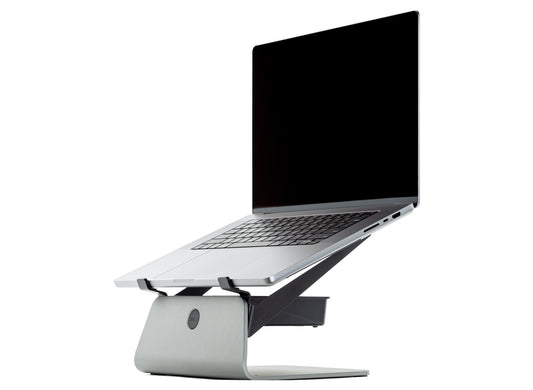
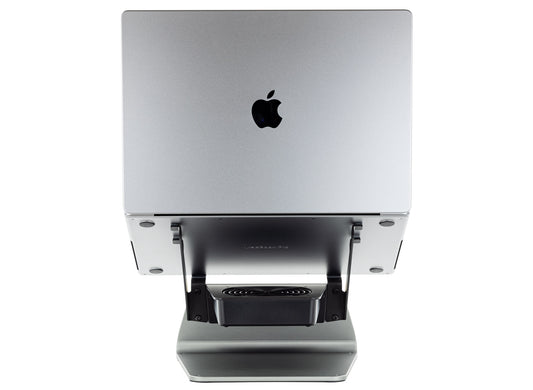
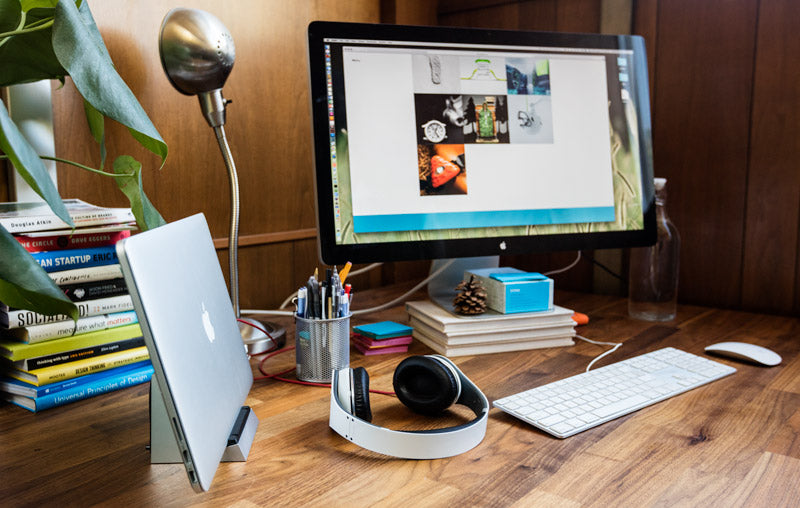 Laptops have become essential tools for working remotely and telecommuting. They contain enough processing power to replace dedicated desktop computers for most applications and can even handle intensive computing workloads such as photo, video and audio production. The issue with using a laptop for high-demand work is that the laptop’s small built-in cooling system and mobility orientated screen/keyboard ergonomics can fall short when you need to crank out work at your home or work office.
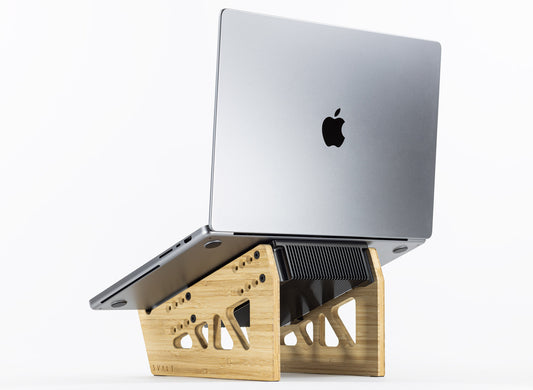
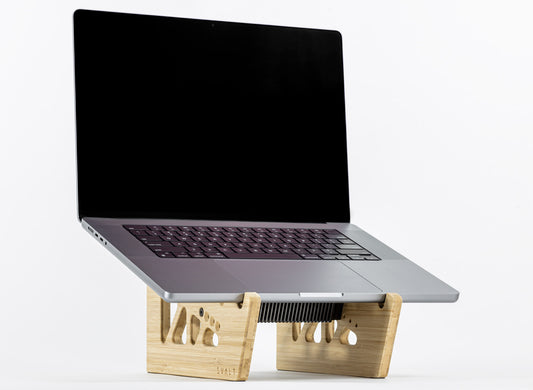
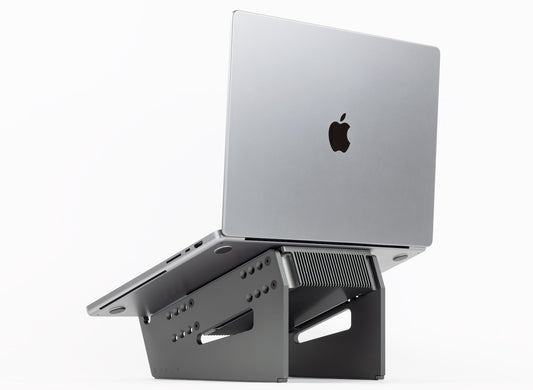
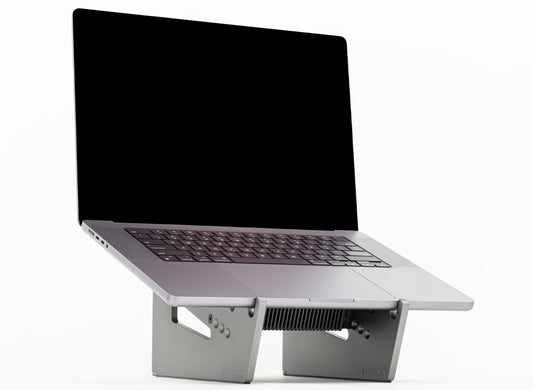
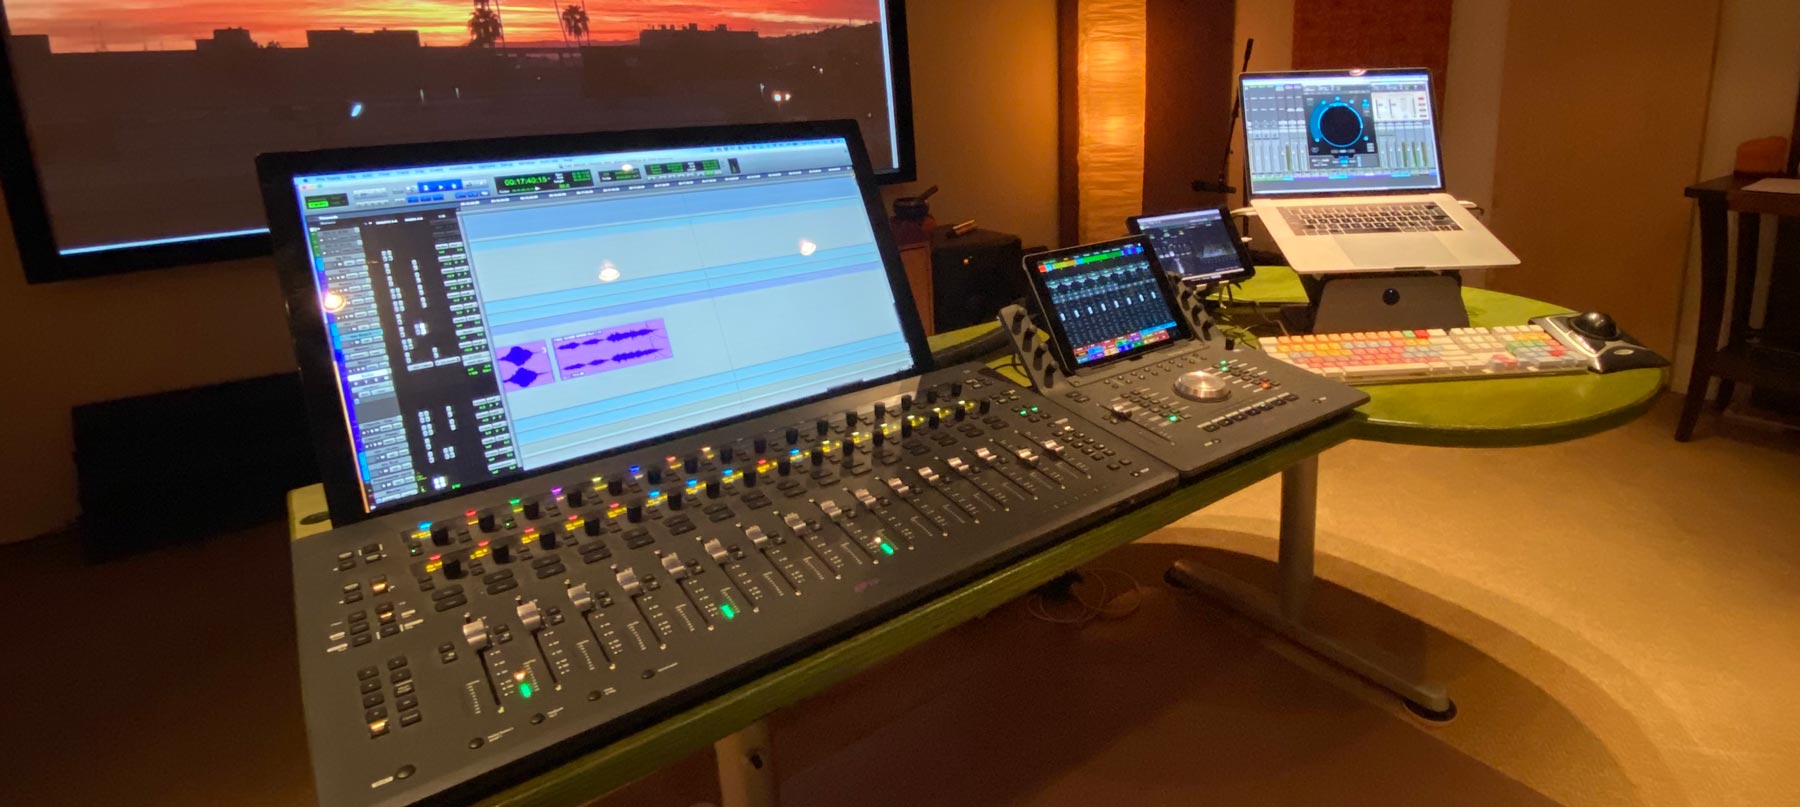
The quest for portability and productivity from a laptop shouldn’t be unattainable, considering how important both are to professionals. This is precisely why we created the first-of-kind and best-in-class SVALT products, to create the ultimate high-performance laptop workstation for those that need the best of both worlds. As a company of like-minded professionals dealing with the same issue, we’re committed to solving this equation through excellence in design and functionality.
Once you have a SVALT product setup per the Product Setup page, then use the following sections to optimize setup for performance and productivity:
- Workstation Layouts for Cooling Docks
- Workstation Layouts for Cooling Stands
- Workstation Layouts for Reduced Heat Gain
- General Workstation Optimization
- General Computer Optimization
- General Ergonomic Optimization
Dock Workstation Layouts
The following workstation layouts for Cooling Dock models are listed based on ranking from the to be avoided #8 layout to the best #1 layout. After reviewing the following workstation layout recommendations, please review the Workstation Layouts for Reduced Heat Gain section.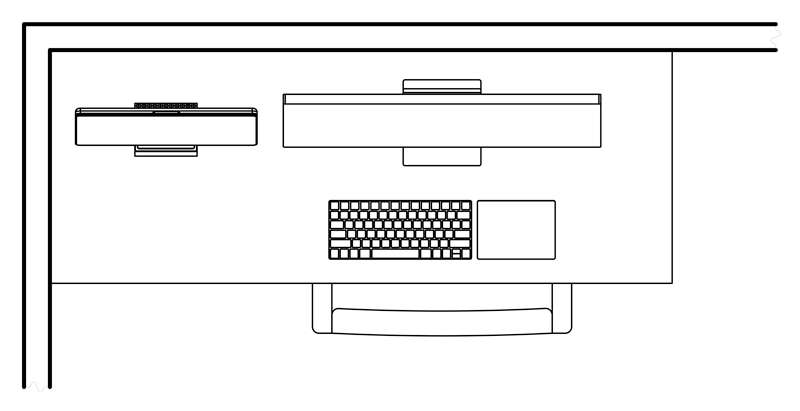 #8 LAYOUT = AVOID
This layout should be avoided as it has the back of the dock and laptop placed into a corner where the desk and walls trap heat and prevent cool air circulation. This layout can dramatically increase temperatures and reduce supplemental cooling efficiency (both passive heatsink/airflow cooling and active airflow cooling). If one of the other improved layouts is not possible, then use the following minimum distance offsets from a solid vertical surface such as walls, windows, cubical partitions, etc to provide a sufficient level of open air space (note that fan cooling is recommended to help force air circulation):
- 12 inch min open space between wall and back of dock/laptop.
- 12 inch min open space between wall and side of dock/laptop.
 #7 LAYOUT = OKAY
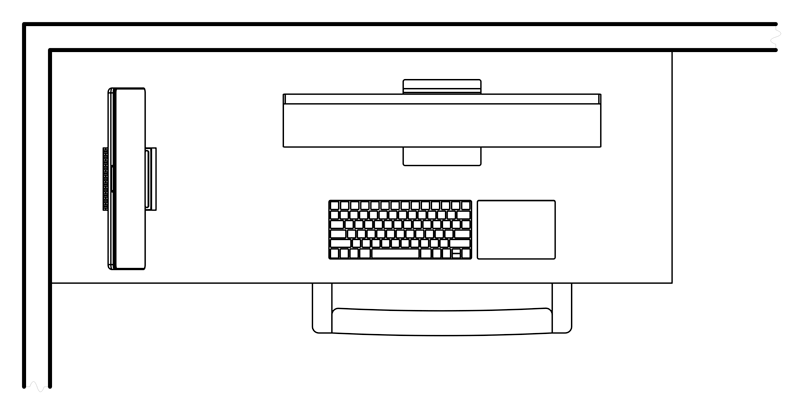
This is an okay layout as it has the back of the dock and laptop rotated 90 degrees, but still placed into a corner where the desk and walls trap heat and prevent cool air circulation. While this layout offers an improvement over the prior #8 layout, it can still increase temperatures and reduce supplemental cooling efficiency (both passive heatsink/airflow cooling and active airflow cooling). If one of the other improved layouts is not possible, then use the following minimum distance offsets from a solid vertical surface such as walls, windows, cubical partitions, etc to provide a sufficient level of open air space (note that fan cooling is recommended to help force air circulation):
- 12 inch min open space between wall and back of dock/laptop.
- 10 inch min open space between wall and side of dock/laptop.
 #6 LAYOUT = GOOD
This is a good layout as it has the back of the dock and laptop placed against a wall, but has been moved away from the corner and moved to the other side of the monitor. While this layout offers an improvement over the prior #8 and #7 layouts, it can still increase temperatures and reduce supplemental cooling efficiency (both passive heatsink/airflow cooling and active airflow cooling). If one of the other improved layouts is not possible, then use the following minimum distance offsets from a solid vertical surface such as walls, windows, cubical partitions, etc to provide a sufficient level of open air space (note that fan cooling is recommended to help force air circulation):
- 12 inch min open space between wall and back of dock/laptop.
 #5 LAYOUT = GOOD
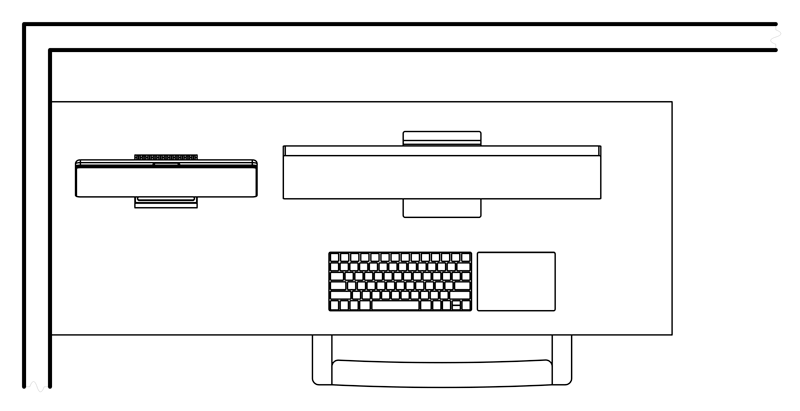
This is a good layout as it has the back of the dock and laptop placed into a corner with the desk and walls, but the desk has been moved away from the wall. The open air space between the desk and wall allows the hot air previously trapped behind the dock and laptop in the #8 layout to rise up and pull cool air from below the desk, which in turn creates a convective cooling air current (note that this assumes the desk has open leg supports and is not fully enclosed underneath). This reduces temperatures and increases supplemental cooling efficiency (both passive heatsink/airflow cooling and active airflow cooling). While even a small opening of a few inches between the desk and wall can help improve cooling air circulation, the larger the opening the better the air circulation. Use the following minimum distance offsets from a solid vertical surface such as walls, windows, cubical partitions, etc to provide a sufficient level of open air space (note that fan cooling is recommended to help force air circulation):
- 10 inch min open space between wall and back of dock/laptop.
- 10 inch min open space between wall and side of dock/laptop.
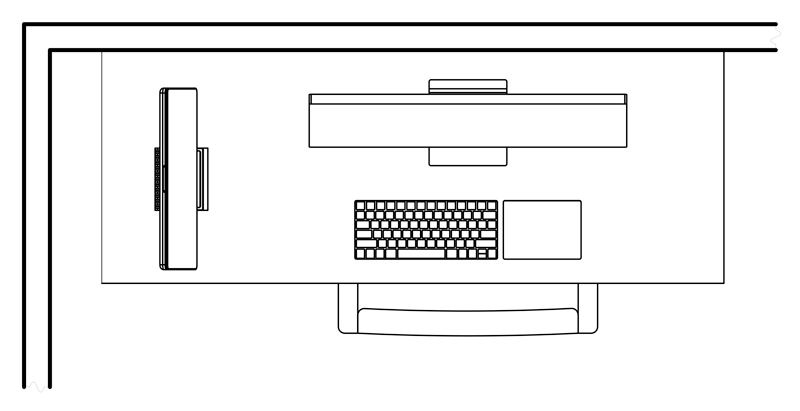 #4 LAYOUT = GOOD
This is a good layout as it has the back of the dock and laptop placed into a corner with the desk and walls, but rotated 90 degrees and the desk has been moved away from the wall. The open air space between the desk and wall allows the hot air previously trapped behind the dock and laptop in the #7 layout to rise up and pull cool air from below the desk, which in turn creates a convective cooling air current (note that this assumes the desk has open leg supports and is not fully enclosed underneath). This reduces temperatures and increases supplemental cooling efficiency (both passive heatsink/airflow cooling and active airflow cooling). While even a small opening of a few inches between the desk and wall can help improve cooling air circulation, the larger the opening the better the air circulation. Use the following minimum distance offsets from a solid vertical surface such as walls, windows, cubical partitions, etc to provide a sufficient level of open air space (note that fan cooling is recommended to help force air circulation):
- 10 inch min open space between wall and back of dock/laptop.
- 8 inch min open space between wall and side of dock/laptop.
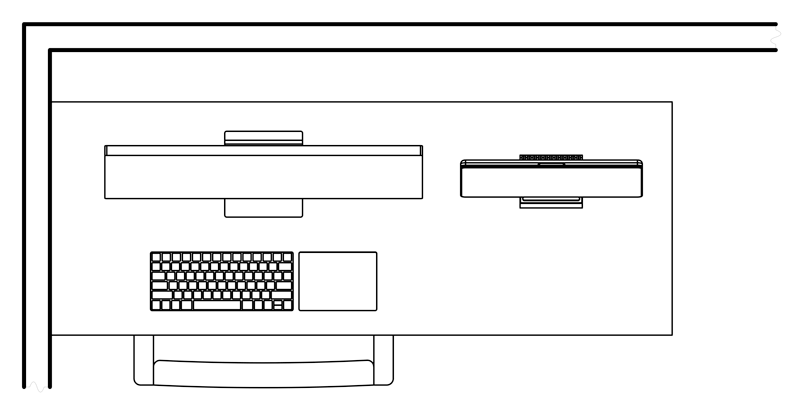 #3 LAYOUT = EXCELLENT
This is an excellent layout as it has the back of the dock and laptop placed against a wall, but has been moved away from the corner and moved to the other side of the monitor, and the desk has been moved away from the wall. The open air space between the desk and wall allows the hot air previously trapped behind the dock and laptop in the #6 layout to rise up and pull cool air from below the desk, which in turn creates a convective cooling air current (note that this assumes the desk has open leg supports and is not fully enclosed underneath). This reduces temperatures and increases supplemental cooling efficiency (both passive heatsink/airflow cooling and active airflow cooling). While even a small opening of a few inches between the desk and wall can help improve cooling air circulation, the larger the opening the better the air circulation. Use the following minimum distance offsets from a solid vertical surface such as walls, windows, cubical partitions, etc to provide a sufficient level of open air space (note that fan cooling is recommended to help force air circulation):
- 10 inch min open space between wall and back of dock/laptop.
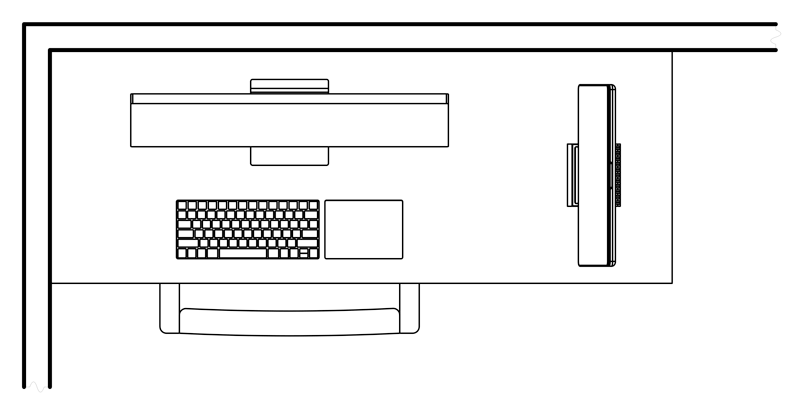 #2 LAYOUT = EXCELLENT
This is an excellent layout as it has the dock and laptop moved away from the corner and moved to the other side of the monitor, as well as rotated 90 degrees. The open air space behind the dock and laptop allows hot air to freely rise up and pull cool air from below, which in turn creates a convective cooling air current. This reduces temperatures and increases supplemental cooling efficiency (both passive heatsink/airflow cooling and active airflow cooling). Use the following minimum distance offsets from a solid vertical surface such as walls, windows, cubical partitions, etc to provide a sufficient level of open air space:
- 8 inch min open space between wall and side of dock/laptop.
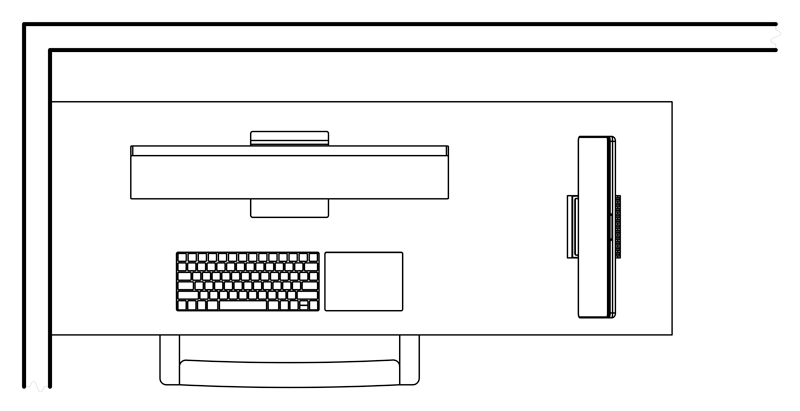 #1 LAYOUT = BEST
This is the best layout as it has the dock and laptop moved away from the corner and moved to the other side of the monitor, rotated 90 degrees, and the desk has been moved away from the wall. The open air space behind the dock and laptop, as well as on both sides, allows hot air to freely rise up and pull cool air from below, which in turn creates a convective cooling air current (note that this assumes the desk has open leg supports and is not fully enclosed underneath). This reduces temperatures and increases supplemental cooling efficiency (both passive heatsink/airflow cooling and active airflow cooling). While even a small opening of a few inches between the desk and wall can help improve cooling air circulation, the larger the opening the better the air circulation. Use the following minimum distance offsets from a solid vertical surface such as walls, windows, cubical partitions, etc to provide a sufficient level of open air space:
- 6 inch min open space between wall and side of dock/laptop.
Back to top
Stand Workstation Layouts
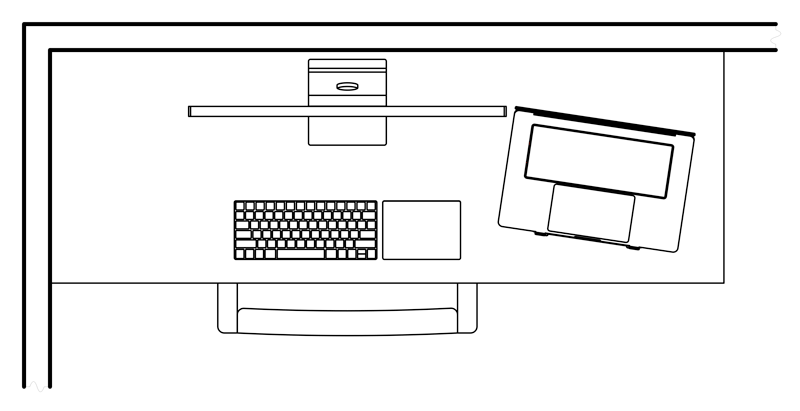
The following workstation layouts for Cooling Stand models are listed based on ranking from the to be avoided #4 layout to the best #1 layout. Note that the following diagrams and text reference Cooling Stand models used with a laptop, but the layouts and recommendations also apply to Cooling Stand models used with Mac Mini and Mac Studio desktop computers. After reviewing the following workstation layout recommendations, please review the Workstation Layouts for Reduced Heat Gain section. #4 LAYOUT = AVOID
This layout should be avoided as it has the back of the stand and laptop placed into a corner where the desk and walls trap heat and prevent cool air circulation. This layout can dramatically increase temperatures and reduce supplemental cooling efficiency (both passive heatsink/airflow cooling and active airflow cooling). If one of the other improved layouts is not possible, then use the following minimum distance offsets from a solid vertical surface such as walls, windows, cubical partitions, etc to provide a sufficient level of open air space (note that fan cooling is recommended to help force air circulation):
- 12 inch min open space between wall and back of stand/laptop.
- 12 inch min open space between wall and side of stand/laptop.
 #3 LAYOUT = GOOD
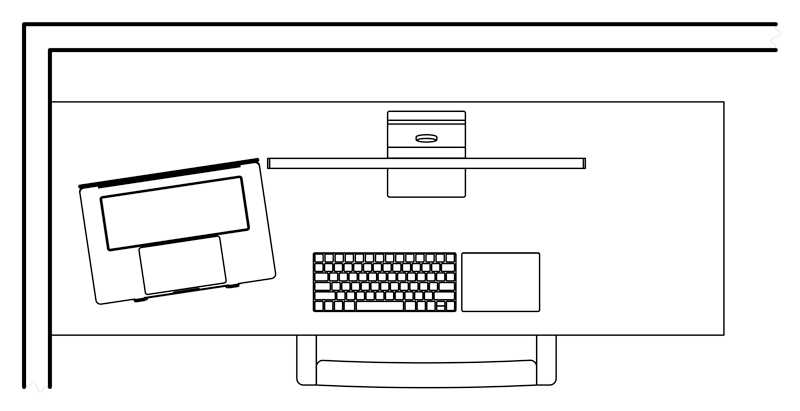
This is a good layout as it has the back of the stand and laptop placed against a wall, but has been moved away from the corner and moved to the other side of the monitor. While this layout offers an improvement over the prior #4 layout, it can still increase temperatures and reduce supplemental cooling efficiency (both passive heatsink/airflow cooling and active airflow cooling). If one of the other improved layouts is not possible, then use the following minimum distance offsets from a solid vertical surface such as walls, windows, cubical partitions, etc to provide a sufficient level of open air space (note that fan cooling is recommended to help force air circulation):
- 12 inch min open space between wall and back of stand/laptop.
 #2 LAYOUT = GOOD
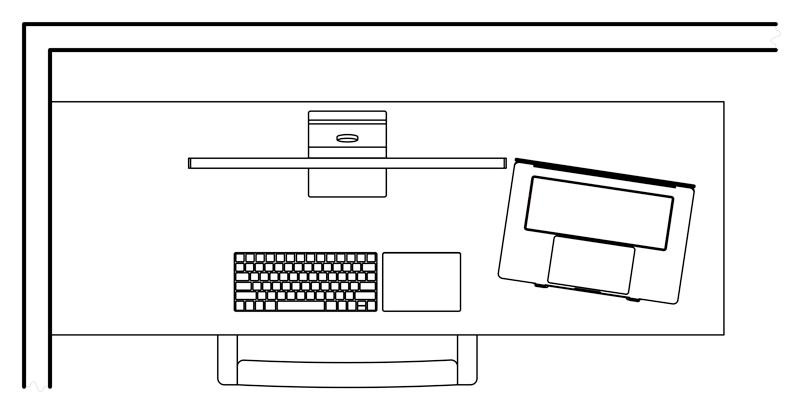
This is a good layout as it has the back of the stand and laptop placed into a corner with the desk and walls, but the desk has been moved away from the wall. The open air space between the desk and wall allows the hot air previously trapped behind the stand and laptop in the #4 layout to rise up and pull cool air from below the desk, which in turn creates a convective cooling air current (note that this assumes the desk has open leg supports and is not fully enclosed underneath). This reduces temperatures and increases supplemental cooling efficiency (both passive heatsink/airflow cooling and active airflow cooling). While even a small opening of a few inches between the desk and wall can help improve cooling air circulation, the larger the opening the better the air circulation. Use the following minimum distance offsets from a solid vertical surface such as walls, windows, cubical partitions, etc to provide a sufficient level of open air space (note that active airflow cooling is recommended to help force air circulation):
- 10 inch min open space between wall and back of stand/laptop.
- 10 inch min open space between wall and side of stand/laptop.
 #1 LAYOUT = BEST
This is the best layout as it has the back of the stand and laptop placed against a wall, but has been moved away from the corner and moved to the other side of the monitor, and the desk has been moved away from the wall. The open air space between the desk and wall allows the hot air previously trapped behind the stand and laptop in the #3 layout to rise up and pull cool air from below the desk, which in turn creates a convective cooling air current (note that this assumes the desk has open leg supports and is not fully enclosed underneath). This reduces temperatures and increases supplemental cooling efficiency (both passive heatsink/airflow cooling and active airflow cooling). While even a small opening of a few inches between the desk and wall can help improve cooling air circulation, the larger the opening the better the air circulation. Use the following minimum distance offsets from a solid vertical surface such as walls, windows, cubical partitions, etc to provide a sufficient level of open air space (note that fan cooling is recommended to help force air circulation):
- 10 inch min open space between wall and back of stand/laptop.
Back to top
Workstation Layouts for Reduced Heat Gain
Supplemental cooling helps to relieve the computer of cooling strain and quiet internal fans under normal conditions, but when under intensive workloads, then supplemental cooling helps to increase a computer system’s total cooling capacity so that it can absorb and remove the additional heat generated by processors running at maximum speeds. Adding heat into the system from external non-processor sources is counterproductive to those goals.Avoid Direct Sunlight
All Macs and many PCs use metal enclosures, and all SVALT products are primarily made of metal. When metal is exposed to direct sunlight it absorbs the sunlight’s radiant heat, which can rapidly and significantly increase temperatures, especially if the metal is a darker color, such as gray or black. If the sunlight heat gain occurs in the processor area of the computer or the non-screen portion of the laptop, then this could reduce laptop performance. And if the sunlight heat gain occurs in a SVALT heatsink, then this will reduce cooling capacity.
If the computer and product cannot be relocated to avoid direct sunlight, then you can take one or more of the following steps to help reduce heat gain:
- 1. Close window coverings so that sunlight does not directly strike the computer and SVALT product, and/or install UV reflective coatings on windows.
- 2. Rotate the computer and SVALT product for reduced heat gain with the following recommendations by SVALT model:
- For SVALT Cooling Dock models it is critical to position the laptop and product to avoid sunlight striking the back, especially the back of heatsink models. The best position has the sunlight hitting primarily on the side but angled slightly so the sunlight hits the front of the laptop. This position allows the laptop to shade the heatsink and ensure sunlight does not hit the back of the laptop. The laptop’s closed lid and screen assembly will insulate against heat gain.
- For SVALT Cooling Stand models, position the laptop and product to avoid sunlight striking the keyboard area of the open laptop, as well as any exposed portion of the heatsink. The best position has the sunlight hitting primarily from the side and back so that the laptop’s open lid and screen assembly shades the keyboard area.
- For SVALT Cooling Stand models with a Mac Mini or Mac Studio, unfortunately any position in direct sunlight will result in detrimental heat gain to the system and potential for reduced performance.
- 3. Darker laptop and heatsink aluminum anodize colors improve cooling just as long as they stay out of sunlight, but they are a detriment to cooling if in direct sunlight, so it is best to avoid direct sunlight. A lighter anodized aluminum finish like silver or raw aluminum will reflect more sunlight with reduced heat absorption.
- 4. Use fan driven active cooling airflow with the SVALT product, especially heatsink models. The active airflow will help to mitigate sunlight heat gains.
Avoid Hot Air
As a general rule, an increase in ambient air temperature will lead to higher computer temperatures. If your office space has forced air heating, then try to position the computer and SVALT product so that it is not hit by heated air. The reverse is true with air conditioning, as that airflow could help drop ambient air temperatures around the computer and SVALT product.
Avoid Heat Sources
External displays, hard drive arrays, and other common desktop accessories can generate and exhaust heat. To avoid transferring that heat to your computer, identify the accessory device’s hot exhaust vent and position it to direct heat away from the computer and SVALT product. Provide a recommended 6 inch minimum and 12 inch preferred separation from heat source on all sides of the computer and SVALT product. Reductions in this open space area will result in reduced cooling efficiency.
Avoid Restrictive Spaces
Locate the computer away from walls and corners for access to more air circulation and avoid trapping hot air that could be pulled back into either the computer’s or the SVALT product’s cold air intake vents. Avoid placing within a small enclosed space (cabinet, shelving, under desk, etc) without a dedicated mechanical air conditioning system (like a server room). Provide the minimum open space around the computer and SVALT product per the above dock and stand workstation layouts. Reductions in this open space area will result in reduced cooling efficiency and increased noise.
Back to top
General Workstation Optimization
Avoid Powering External DevicesSVALT products intentionally use external wall power to drive a more powerful 12 volt fan and to avoid pulling power from the computer through a 5 volt USB connection. This not only results in reduced cooling power but would result in additional heat generation within the laptop to supply power to the fan. Pulling power from the computer can also be problematic when maxing out laptop systems as less power is available to the processors and can lead to processor power throttling, which in turn leads to reduced performance. This extends to other peripheral devices that pull power through the computer’s USB or Thunderbolt ports, as they will all result in higher internal computer temperatures and increase the risk of processor power throttling.
Reduce External Displays
SVALT products help manage the additional heat generated when using a laptop as a desktop replacement with external monitors. However, if you are tackling an intensive task that does not require additional screen real estate, then reducing the number of connected external displays or limiting the external display to a single lower resolution monitor will help reduce the computer’s GPU’s workload. Depending on the application and external display configuration, external GPUs (eGPU) can help transfer workload away from the computer’s internal GPU. Otherwise, using only the laptop’s built-in display will generally help maximize performance.
Use External Power Supply
Running on external power supply with the battery charged will minimize heat internal generation. Using the original Apple power supply that shipped with your laptop (or a genuine Apple replacement) ensures your laptop has full and reliable power supply. Alternatively, power can come from an external display or cable hub, but make sure it provides sufficient and reliable power for your laptop model.
Use UPS When Required
Similar to loss of data, a sudden loss of power or a severe power fluctuation can cause a computer’s built-in data storage and external data storage devices to fail. One of the advantages of using a laptop is that it includes an internal battery that acts as an Uninterrupted Power Supplies (UPS), so your laptop only requires a surge protector. If power is lost while running in clamshell mode, either from a power utility event or from accidentally disconnecting the power cable, then the laptop will instantly enter sleep mode. If you are using bus powered external drives that pull power through the data connection cable, then in most cases the data on the external drives should also be protected. However, if you are using external drives that require a separate power source, then a UPS will be required for those drives. Be sure that you do not use the UPS for your laptop power source and that you only use a surge protector for the laptop power. See Apple’s article Troubleshooting MagSafe Adapters for an explanation of why a UPS should be avoided when using a laptop.
Back to top
General Computer Optimization
Reduce Background ActivitiesA computer’s operating system and applications can consume considerable resources and increase temperatures without you having launched an application or executed a task, such as Spotlight indexing, Diagnostic Submission, TimeMachine backups, cloud based storage backups, other network activities and virus activities. You can use Apple’s Activity Monitor found inside of the Utility Folder located within the Applications Folder to identify and then disable unnecessary applications that tax your system (CPU, GPU, RAM, storage, network, etc). One of the easiest quick fixes is to disconnect wired internet connections to turn off wireless internet connections. This will prevent a number of background activities, including receiving emails, texts or photo calls from interrupting an intensive workload. Another way to eliminate unwanted background activities is to remove unnecessary Login items, applications that automatically launch at startup. To see and remove these applications open System Preference, go to Users & Groups, click on Login Items, uncheck or delete unnecessary items, preventing then from launching, and then restart if required.
Close Applications
Quit any applications not required. Running a virtual machine (VM) or running an application in a VM is going to zap performance, so avoid if possible, or if a native macOS option isn't available then run the OS/App in Boot Camp instead.
Update Software
Keeping your OS and applications updated usually helps things sync up for smoother and faster operation. With the exception of security updates, it is generally a good idea to wait a few days/weeks to learn of any issues before installing a major OS/App or firmware update, or wait until after the first bug update/patch has been released.
Free Up Boot Drive Space
When a hard drive includes your OS it is known as the boot drive, and when your boot drive starts to run out of free/open space then speed can take a huge hit. Depending on what you are doing, the type of boot drive, and the drive’s capacity, you may need between 10-50% and 10-100GB of your boot drive to be free space. In general 15% or 15GB is considered minimum, and once approaching that level then you should be prepared to upgrade to a larger drive or transfer data to free up space. If you work with large photo, video, rendering or other files, then 100GB is a more reasonable minimum. Another way to free up boot drive space is to keep your project data on an external drive. Just be sure to use a fast 7200RPM drive, SSD drive or multiple RAID drives if storage speed impacts on your workflow.
Backup Data
All storage devices will eventually fail, and a sudden loss of data is a sure fire way to reduce productivity. It is not a question of if, but when data loss could occur from reaching the drive’s end-of-service life, accident or theft. Any important data requires regular backups. If you do not require large backup capacity, then online/cloud based backup solutions can provide a simple and robust option. However, if you require large backup capacities, then you will likely need to use a local and off-site physical backup system. For many consumers, Apple's built-in Time Machine software with a couple inexpensive external drives will provide sufficient physical backup protection. For professionals, keeping a cloned copy of your working drive with Carbon Copy Cloner plus multiple copies of external storage sets is highly recommended. A 7200RPM desktop drive or SSD drive will cut down on backup times. Note that RAID drives might not be your best option for backups because the additional hardware and/or software increase the chances of failure and many default RAID configurations prioritize speed over reliability.
Back to top
General Ergonomic Optimization
Improve ErgonomicsThere are numerous sources on how to setup and maintain an ergonomic workstation, including Apple’s Ergonomics page, and most hit upon the following for both sitting and standing workstations:
- Position the screen at eye level so that you look straight ahead, instead of looking down, up or to either side. The screen should be near enough that you can see the required level of detail without having to lean forward, but not so close that you have to constantly move your head around to see the full display.
- Position the input devices, such as keyboard, mouse, trackpad, trackball and drawing implement where your hands fall when they are level with your elbows, your elbows are directly below your shoulders, and your shoulders are relaxed. The input devices should be directly in front of you so that you do not have to extend your hands outward or to either side.
Back to top

